startup
Table of Contents
- 1 start up procedure for PAX (PlAsma eXperimental device)
- 1.1 open Ar gas pressure regulator valve, bottle-side
- 1.2 close, very gently, the needle valve, until one feels it 'touch' the bottom or 'bottom out'. One DOES NOT TIGHTEN IT DOWN.
- 1.3 open the green shut-off valve immediately upstream from the needle valve.
- 1.4 slowly open the needle valve until one sees the ion gauge jump to the 10-5 Torr scale, then slowly continue opening the leak valve until one has reached the desired pressure. This will be less than 1 mTorr
- 1.5 Ok, one is half way there….. Now, turn on both the filament supply and the discharge supply.
- 1.6 set the discharge voltage to 60V (the discharge current reads 0 still)
- 1.7 slowly turn up the filament supply voltage until the discharge supply reads the desired discharge current.
- 1.8 YOU SHOULD HAVE A BEAUTIFUL STAR-SHAPED PLASMA!
- 1.9 now do measurements!
1 start up procedure for PAX (PlAsma eXperimental device)
the start up condition for the chamber is that it is under vacuum, current best vacuum is 2-4 x 10⁻⁷ Torr. Ar shut-off valve is shut off, and the needle valve (leak-in valve) is all the way open. The discharge supply and the filament supply are turned off. All diagnostic instruments are turned off (e.g., the Kepco BOP, dso's, emissive probe circuit box, and so forth). This is the state to which the chamber is returned at day's end before going home, and turning off the lights in the lab. Next day, one makes a plasma, an Ar plasma, as
1.1 open Ar gas pressure regulator valve, bottle-side
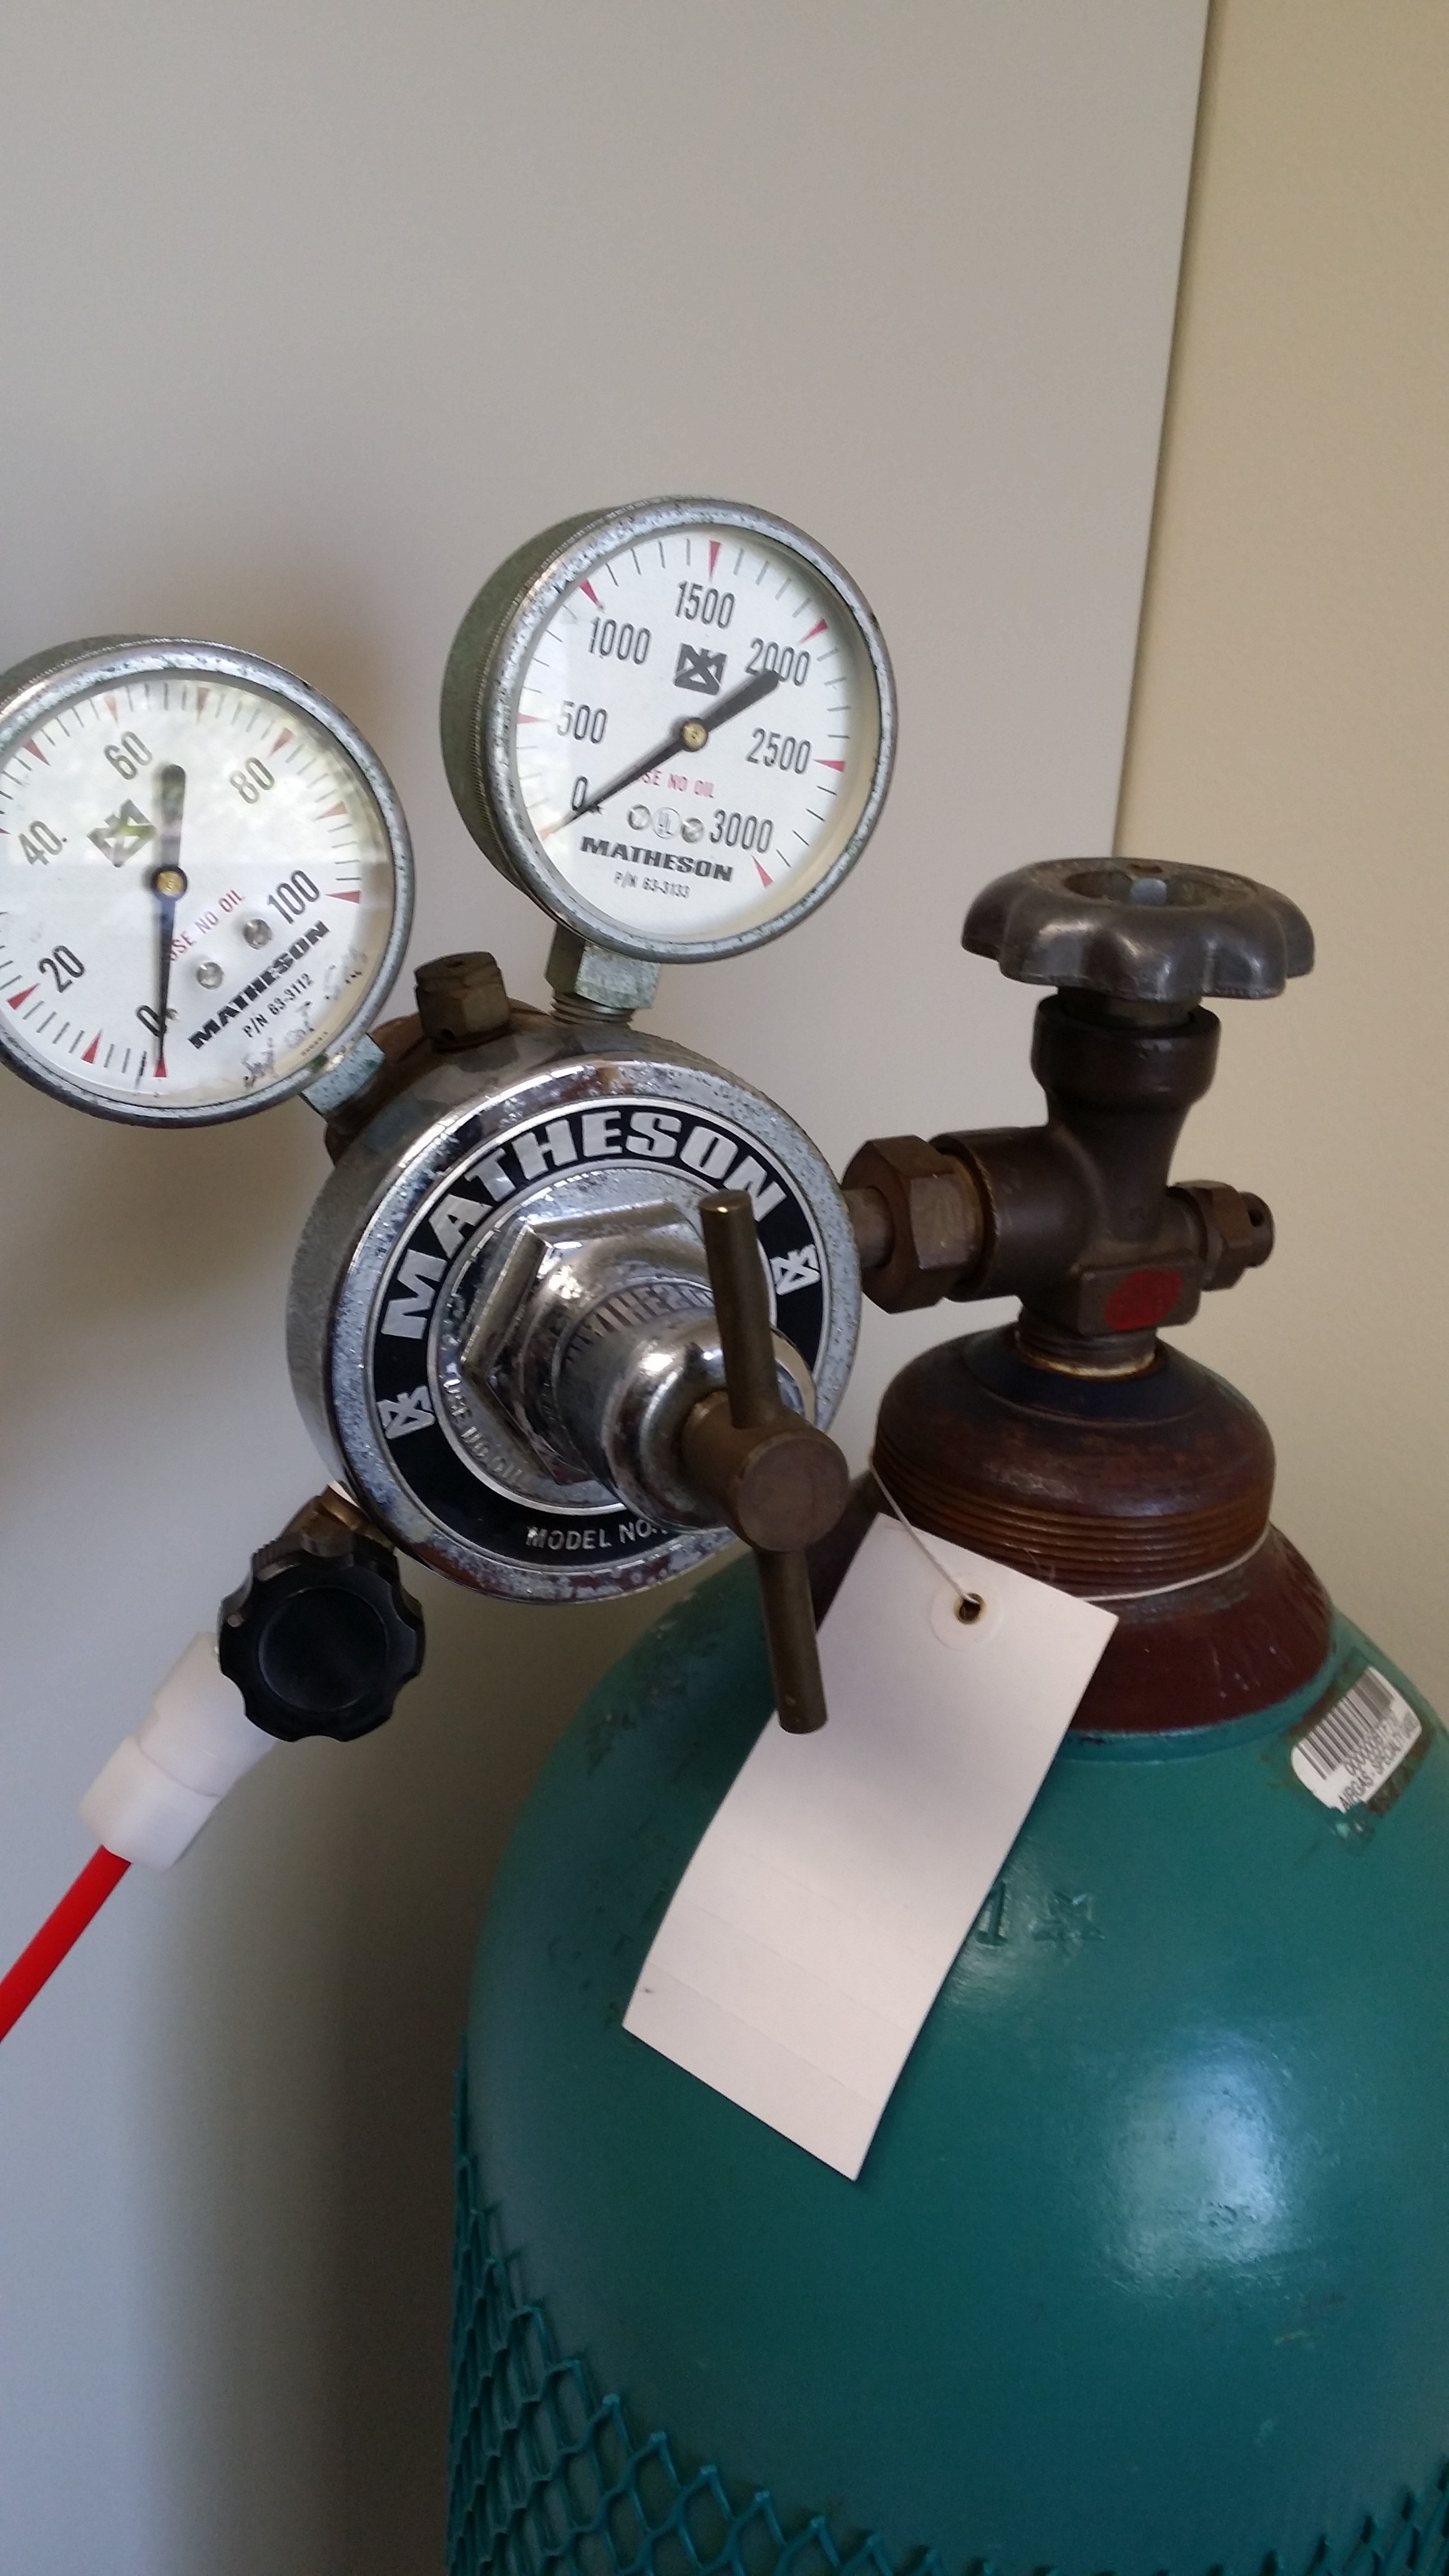
Here's the Argon bottle, chained to the fume hood
1.2 close, very gently, the needle valve, until one feels it 'touch' the bottom or 'bottom out'. One DOES NOT TIGHTEN IT DOWN.
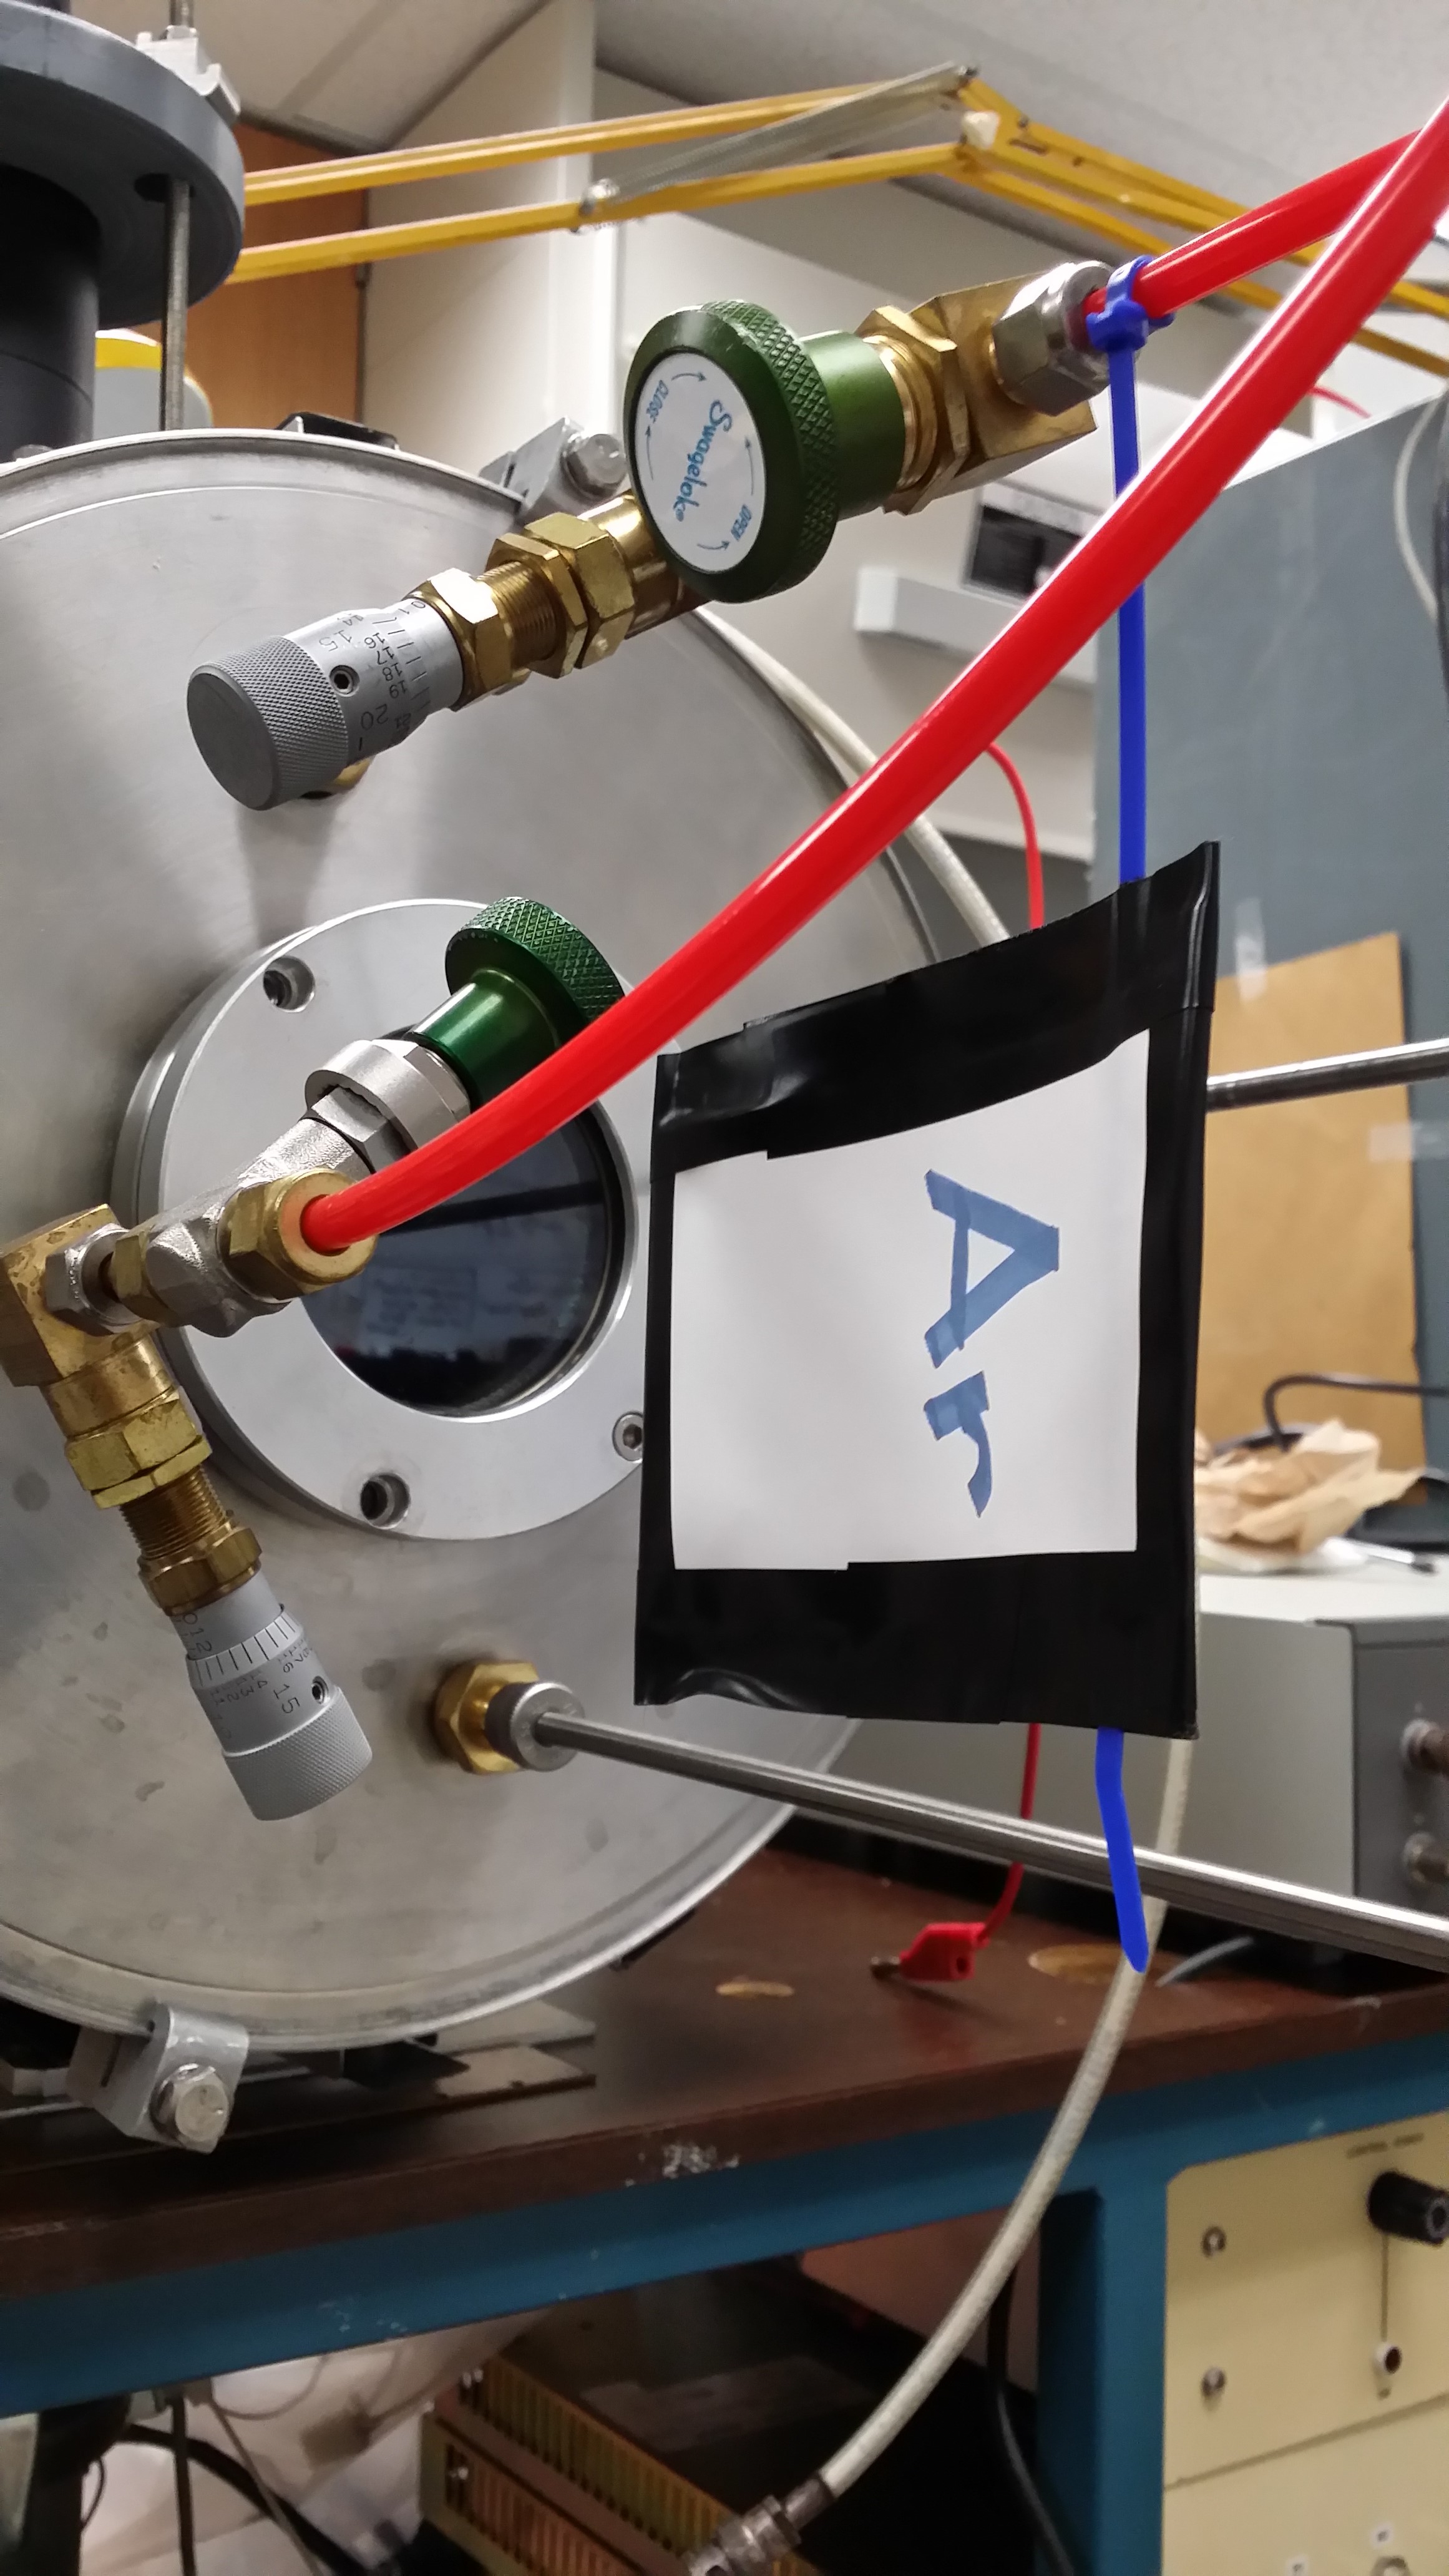
There are two 'shut off & needle valve' combinations on our chamber. The one attached to Ar is so marked
The needle valve is on the left, with the micrometer screw control. The shut-off valve is on the right
1.3 open the green shut-off valve immediately upstream from the needle valve. Note, not all needle valves are closed when they are bottomed out, but ours are. At this point there is no gas going into the chamber.
1.4 open the needle valve to its opening value on the micrometer, or get close to that, then very slowly open still farther, until one sees the ion guauge jump to the 10-5 Torr scale. This jump scares a person at first and then one gets used to it. One wants to keep from opening the valve full throttle, causing the ion guage to see a pressure north of 10-3 Torr, thus causing the valve to shut itself off. Sneak up on the 'opening' of the gass flow, let the system recover to something in the 10-5 range, and then slowly continue opening the leak valve until one has reached the desired pressure. This will be less than 1 mTorr (because we have no reliable pressure guage that works north of 1 mTorr). Set the pressure to 0.5 mTorr! Go from there….
1.5 Ok, one is half way there….. Now, turn on both the filament supply and the discharge supply. Zeroes everywhere.

The filament power supply is on top, the discharge supply below. These are atop the Ion Gauge controller
1.6 set the discharge voltage to 60V (the discharge current reads 0 still)
1.7 slowly turn up the filament supply voltage until the discharge supply reads the desired discharge current. Often we like to run at 1A. But 0.5 is fine too, depending.
1.8 YOU SHOULD HAVE A BEAUTIFUL STAR-SHAPED PLASMA!
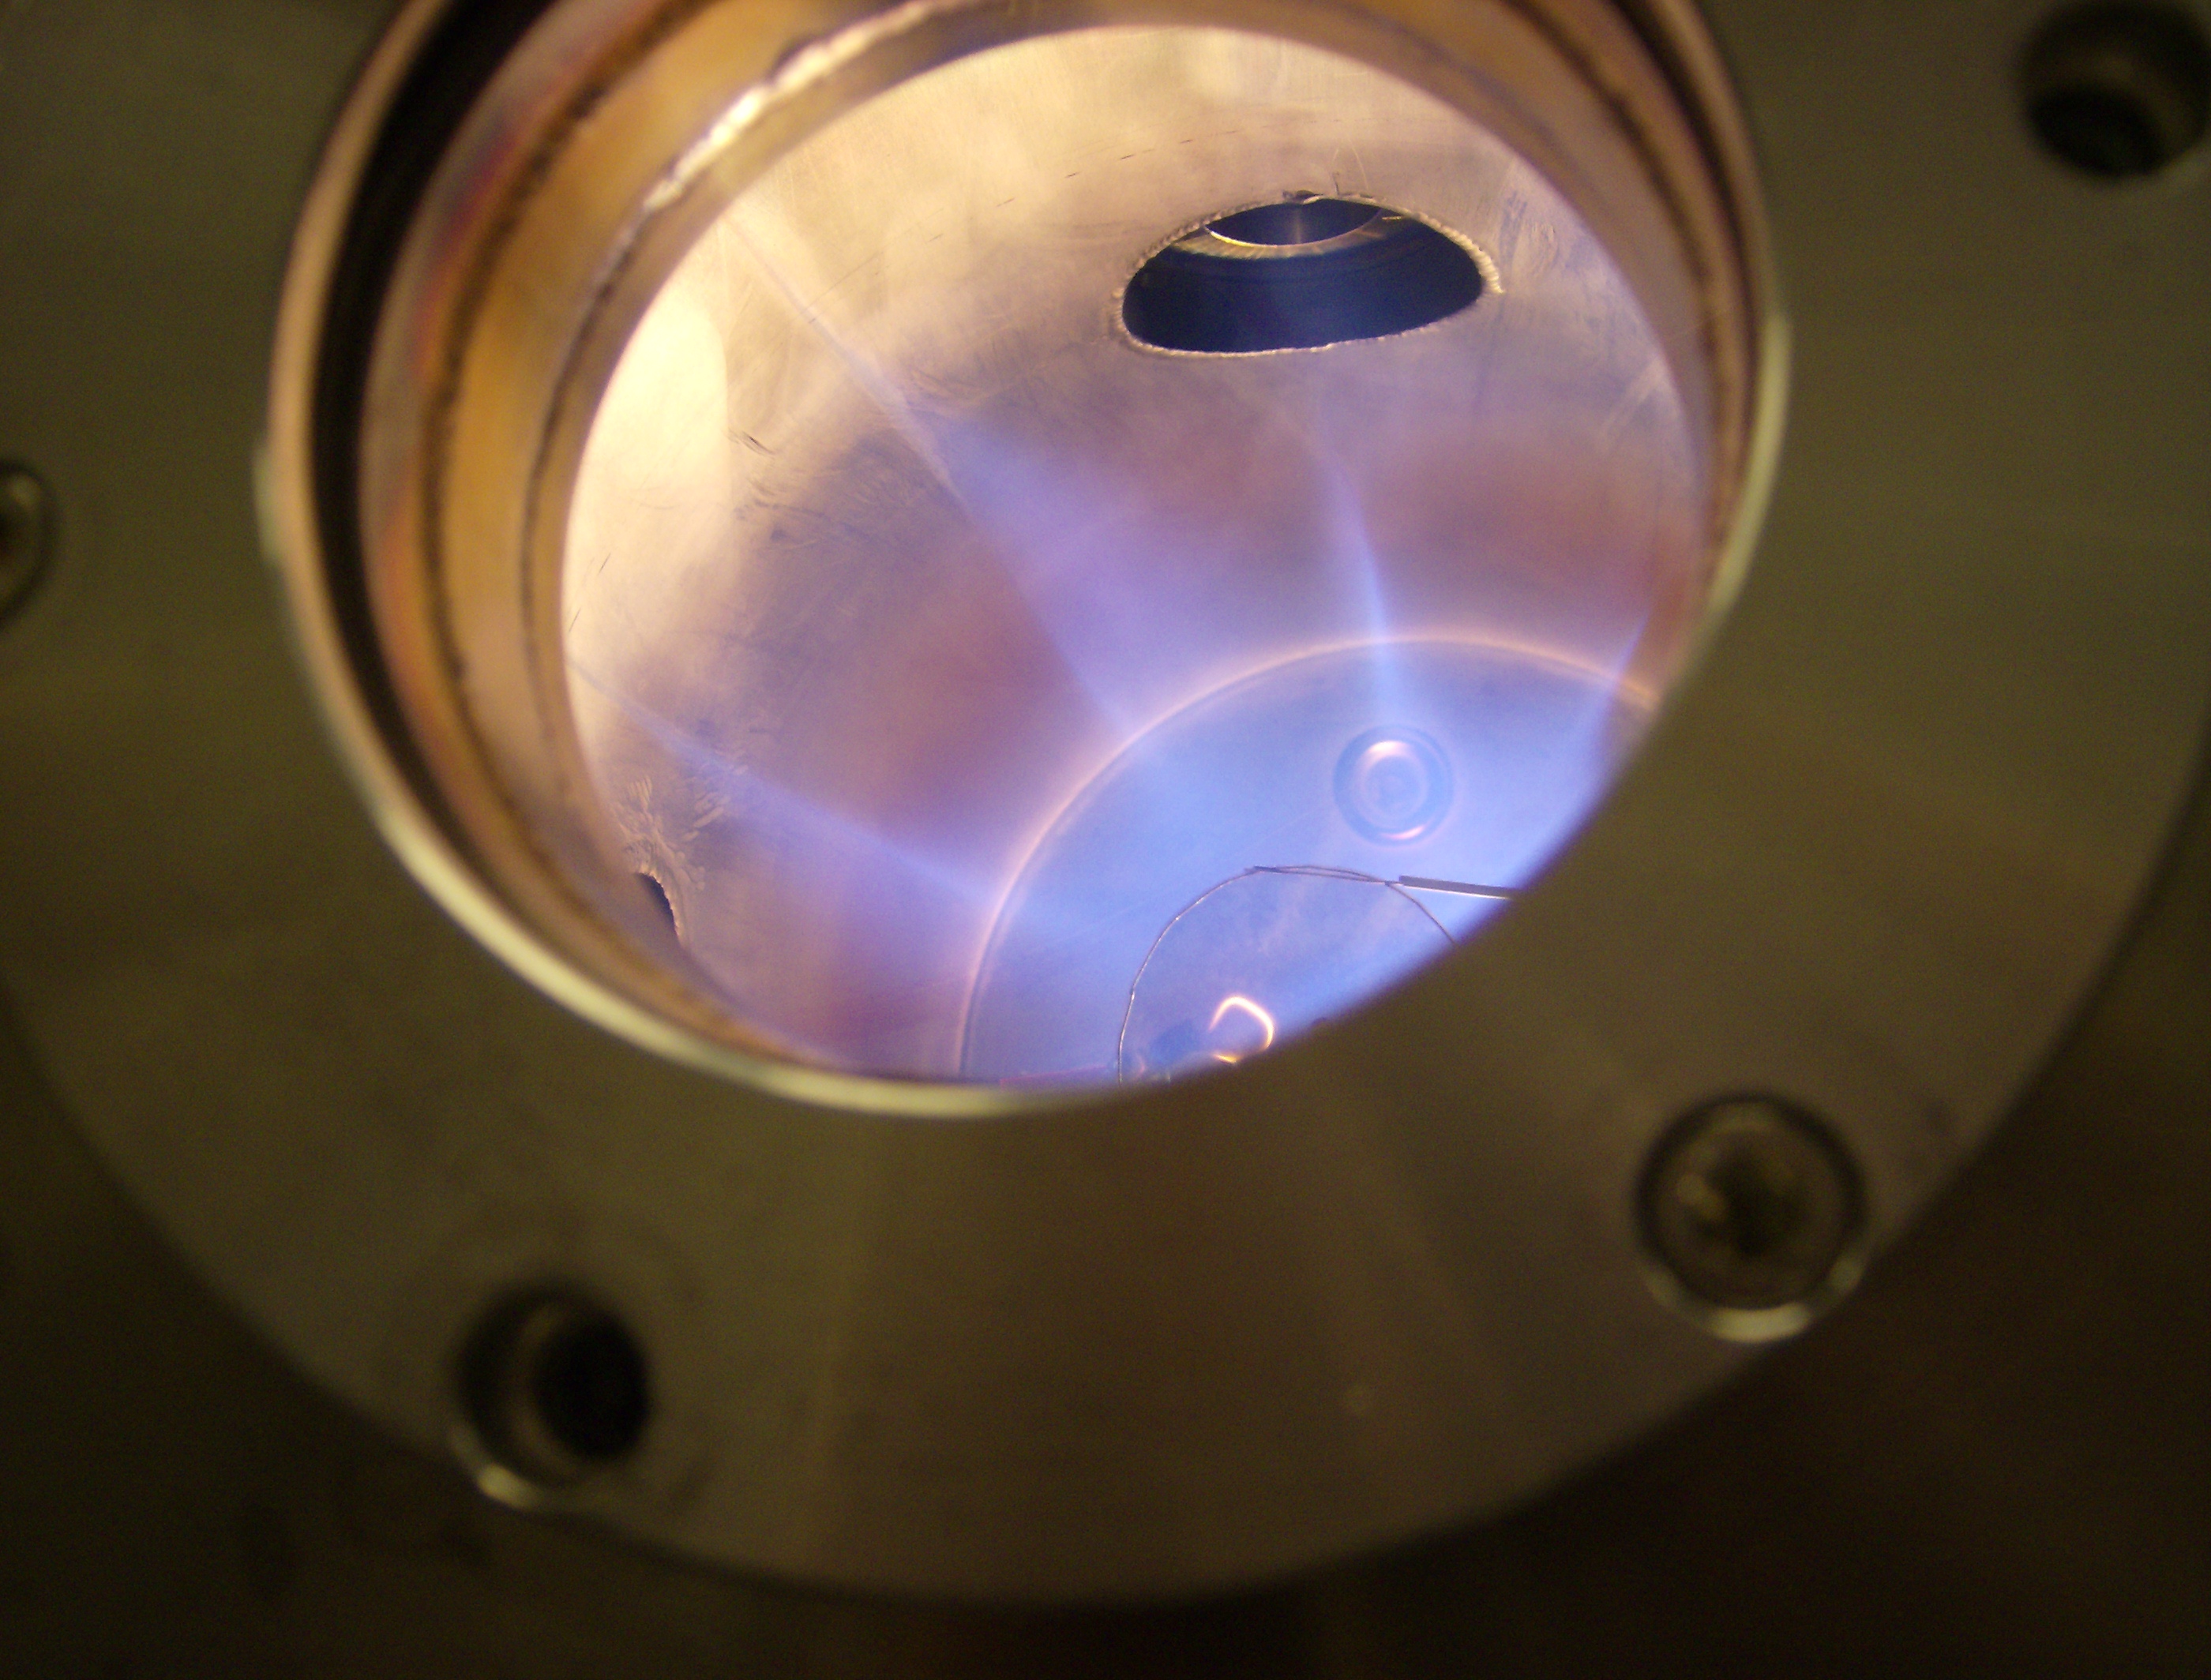
A view inside the chamber when Ar discharges light things up