Re-analyze your assigned genomic sequence with FGENESH to show individual exons:
Directory of O. myriophila genomic sequences.FGENESH - a gene prediction program.
1. As previously (if it's not already selected), click on 'Show advanced options'.
![]()
2. Select on 'print exon sequences...'; Deselect 'print mRNA sequences...'
![]()
3. Select 'Caenorhabditis elegans' for Organism (start typing in the window and it will show up).
4. As before, browse to, and select your genomic sequence (plain text file), then, click the "Search" button.
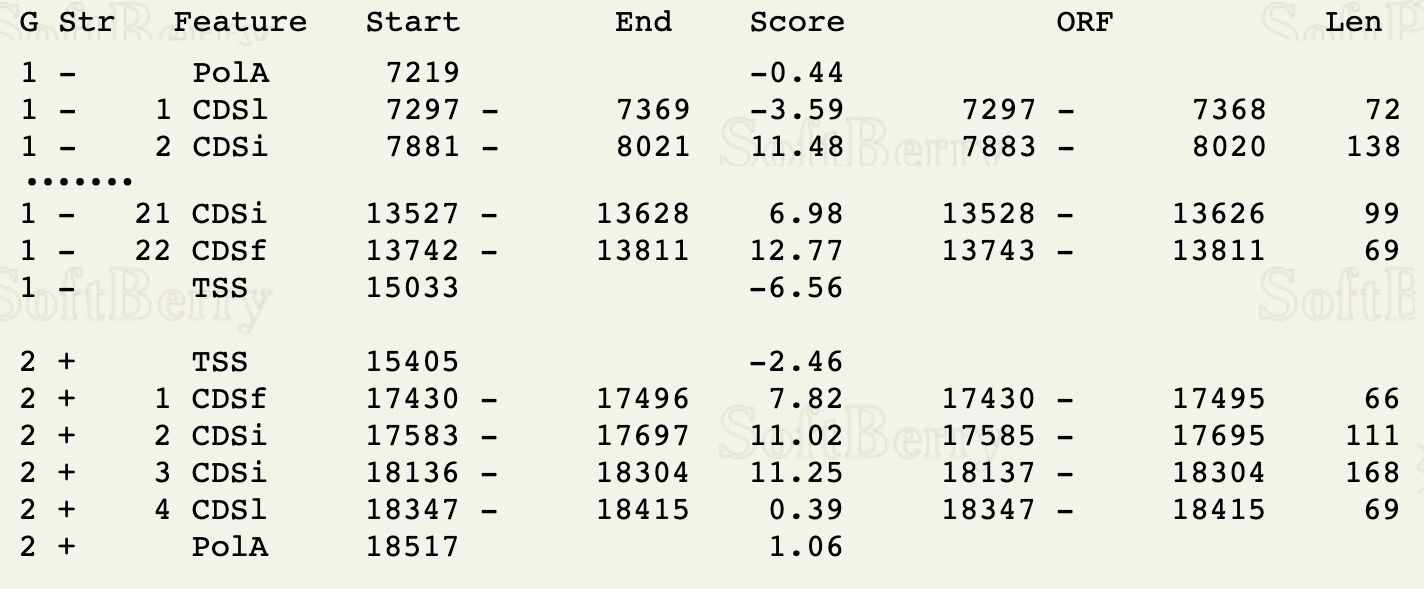
5. For this exercise, we will pay attention to your first gene on the '+' strand (this will make the searching easier), to identify and annotate the first two introns predicted by the genefinder in your sequence.
a. Looking at the second column in the output, find the first gene on the '+' strand. In the example below, this is Gene 2. Make sure it has at least 3 exons; if not, proceed to the next + strand gene with at least 3 exons.
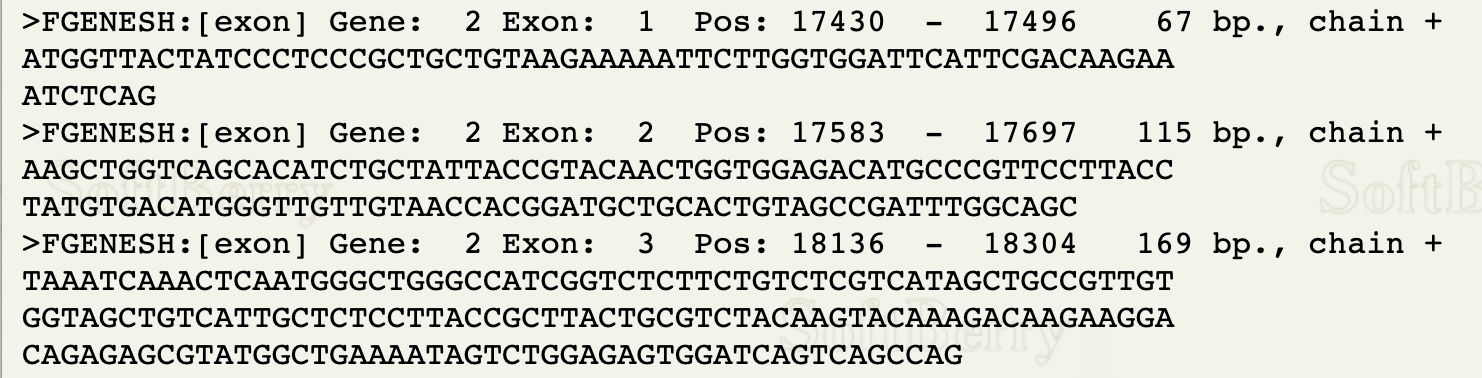
b. Proceed down the page to Gene 2 (or your first + strand gene), and copy the sequence of the first 3 exons, and paste the text to your working document.
6. To facilitate searching your full genomic sequence, we need to remove all of the 'line breaks' in your current sequence.
a. Open this online utility: Remove Line Breaks
b. Paste your full genomic sequence into the 'Original Text' window without the fasta identifier first line.
c. Click on 'None' under 'Convert Line Breaks', then click 'Convert'. The sequence will appear below with no line breaks.

d. Click 'Copy to Clipboard' and then paste the modified sequence into a document under a new fasta identifier such as ' >Omy_NODE_11b_no-line-breaks '.
7. Now you need to locate the region of your gene within the large genomic sequence. Select the last several (7-10) bases at the end of exon 1, and search for this sequence (i.e., 'Find' in your word processor). Make sure that this sequence is found only once in the large sequence (if not, use a longer selection of the end of exon 1 to search).
a. Mark (e.g., underline or background color) the end of exon 1.
b. Next, select the first several (7-10) bases at the beginning of exon 3. Like in step 7a, mark this location.
c. You've now located the region containing introns 1 and 2. Create a new shorter sequence file by selecting and copying all the sequence starting from a line above the end of exon 1 to a line below the beginning of exon 3. Copy to a new document -- this is the sequence you will work with from now on.
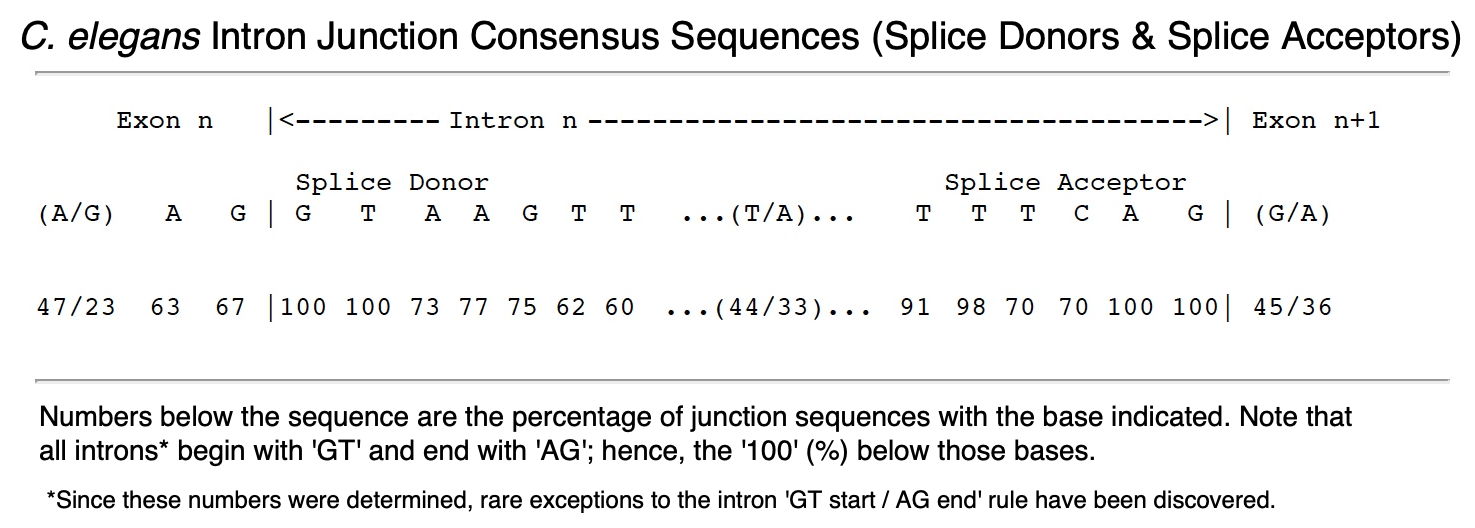
d. At the beginning of intron 1 (just beyond the end of exon 1), now identify and mark the Splice Donor (SD) consensus sequence that begins with 'GT' - below is the intron boundary consensus sequence for the nematode C. elegans. Our O. myriophila nematode genomic signal will be very similar. Line up your actual SD sequence with the consensus (GTAAGTT) and show how many bases are identical (see an illustration below for how to do this). Note that you will want to begin putting convenient line breaks back into your sequence - keep all of the elements you're illustrating on a single line.
f. Continue with this until you have marked the exon-intron boundaries showing introns 1 and 2 for your first + strand gene. An example nicely illustrated gene is shown below. Add in line breaks as needed to prepare such a figure - this is what should be included among your 'Work Products' for the lab.
Example of completed sequence diagram of Exon-Intron boundaries for Exercise 6B
